Well the deadline of Labor Day weekend is looming. We have a family trip planned where there will be 4 other trailers/RV going to Vermont over the weekend. I made a reservation late last year as a goal to get the camper done for the trip... no doubt I am close. But close isn't going to cut it. The more I think about how much is left the more I know that it isn't going to happen. I would normally take a weeks vacation and work on it non stop, but with my work schedule and my wife's, its not panning out. So I am stuck with just working weekends. Its a bit depressing but What can you do?
We had a fairly productive weekend last week. The door side skin is on and the front skin is also complete. A few other odds and ends were buttoned up as well. Lets take a look at the task list, shall we?
COMPLETED!!!
- Wire a couple of exterior outlets
- Get new glass for all broken windows
STARTED
- Fix the skin (Just the Roof Left)
- Mount skin... again Roof, by far the hardest part.
- Install all exterior items that will be painted.
- Wire and mount exterior lights
- Restore and recover dinette cushions. (OH THE MOUSE PEE!)
- Rebuild and polish windows (1 LEFT!)
NOT YET STARTED
Plumb LP for hot water heater
Prep skin for paint (Test paint strippers and polishing!!!!)
Rebuild door
Paint
Make floor boards and install
Poly Floor..three coats
Mount new tires (rims are sandblasted)
Mount all windows
Build new wings (damn you previous owner who removed them!)
Mount wings
Make and install trim for all windows inside
Install toilet and plumb
Make curtains and mount rods
Battery and Battery Box
REGISTER THE CAMPER!
Uggs is all I can say..... If you read this list you know why 4 more weekends of work is not going to finish this camper.

Your Place for the Best Shasta Reproduction Wings Anywhere, and Shasta Restoration Knowledge!!!
Thursday, July 28, 2011
Tuesday, July 19, 2011
The Color Dilemma
Colors Colors Colors!!! I am getting close to crunch time on picking out a color... I could use your help. I have added a poll to this blog with some of my top choices. I would like your input and your vote. I have searched the web for some images of Shastas with the color combos I am proposping... I think this will help.
All painted versions would have a polished silver stripe... all polished versions would have a white painted stripe
![]()
![]()
![]()
![]()
![]()
Thanks
All painted versions would have a polished silver stripe... all polished versions would have a white painted stripe
Below is the Colonial white with the Sage Green. These were orignial colors on the T-Bird in 1957...very sharp

Below is the White with Seafoam Green

The classic and VERY popular White with Turquoise

Thise would be close to the original colors of my Camper White with Canary Yellow.

Finally is an example of a polished Shasta.... lots of work but with an impressive result. This is Polished with a Coral Bottom. This very camper was on Ebay a couple weeks ago.
Try to imagine the polished with the other colors listed above and a white stripe for my other options.

Let me know what you think!
Monday, July 18, 2011
Stage 4 Continued 7/16/2011
Here are some photos from this weekends progress. We had a couple of significant milestones.
1) We tested the water system and everything works well. Had one leak in the shower so I had to pull one wall down and fix that. Not a huge issue. We also learned that we might need to add some pitch to the fresh water tank. When the water gets low the pump starts sucking air.
2) The vanity is 100% done! counter is in and plumbing complete. Fridge is all done as well... one more item off the list
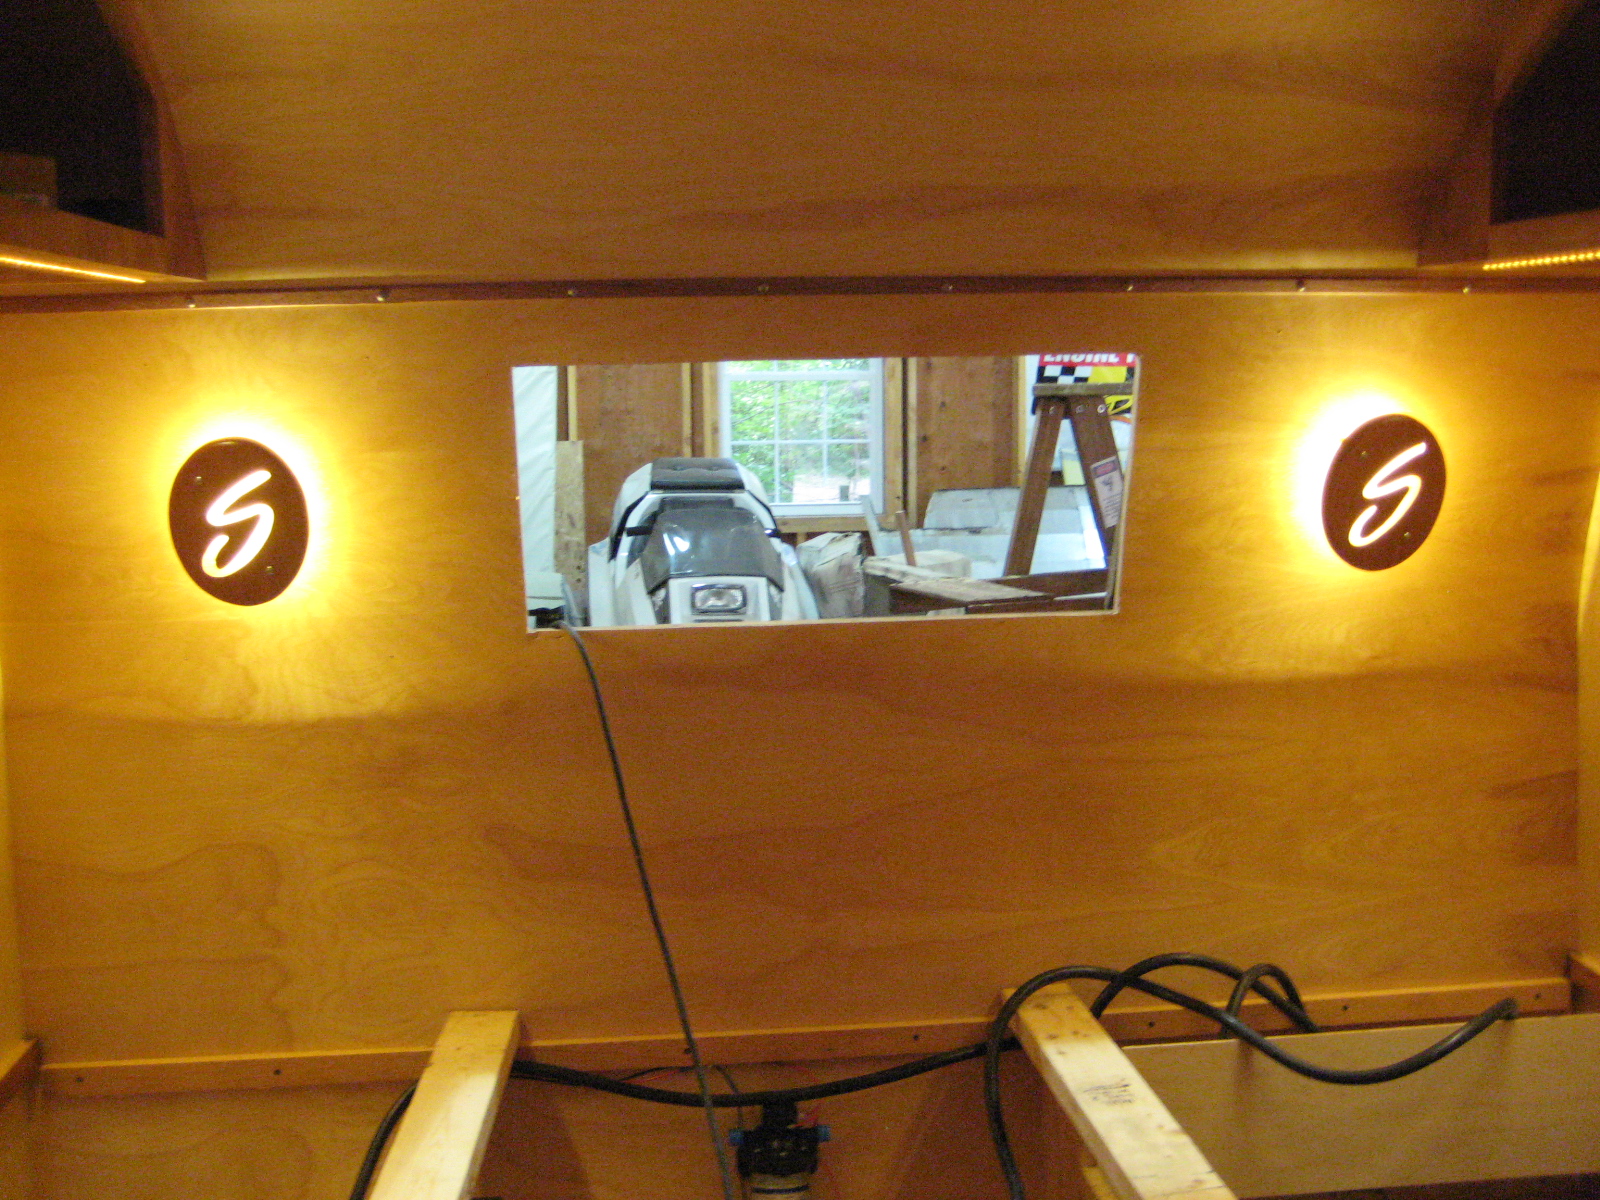
3) The control panel that I made for the rear LED's is done. These have PWM dimmers in them not the standard kind of light dimmer you can get at Home Depot. That was a bit of work but the final result is worth it. Note to anyone using these. The commercially available dimmers are not shielded well against EMC and can cause interactive pulsing of the lights. Keep them far apart, or add metal shielding. A word of thanks to my friend Dave for his assistance.
4) One side of the skin is done! Really makes me see the end of the road just might be near.... maybe
Enjoy
![]()
![]()
![]()
![]()
![]()
![]()
![]()
![]()
![]()
![]()
![]()
![]()
![]()
![]()
1) We tested the water system and everything works well. Had one leak in the shower so I had to pull one wall down and fix that. Not a huge issue. We also learned that we might need to add some pitch to the fresh water tank. When the water gets low the pump starts sucking air.
2) The vanity is 100% done! counter is in and plumbing complete. Fridge is all done as well... one more item off the list
3) The control panel that I made for the rear LED's is done. These have PWM dimmers in them not the standard kind of light dimmer you can get at Home Depot. That was a bit of work but the final result is worth it. Note to anyone using these. The commercially available dimmers are not shielded well against EMC and can cause interactive pulsing of the lights. Keep them far apart, or add metal shielding. A word of thanks to my friend Dave for his assistance.
4) One side of the skin is done! Really makes me see the end of the road just might be near.... maybe
Enjoy


Wednesday, July 6, 2011
Stage 4
So we are finally up to date. These photos represent where I am today. All major plumbing is done, all waste tanks are installed, 99% of electrical is done, the interior is sprayed with three coats of polyurethane, all interior furnishings are built and most are poly'd, electric brakes are done along with the bearings, all external running and tail lights are wired, all skylights and roof vents are ready to go, 60% of light fixtures are installed.... some of them are custom made and I have to say the final affect is fantastic (photos below). I used LED strip (available on eBay, or i got them from superbrightleds.com) not cheap to say the least but worth it. Very low power consumption, minimal heat, and they should last a very long time.
So whats left... it sounds like we are practically done. Well the answer is plenty, I am going to type these items as I think of them and its going to become my "to do" list:
Wire a couple of exterior outlets
plumb LP for hot water heater
Fix the skin (lots of dings and dents and holes oh my!)
Prep skin for paint
Rebuild door
Mount skin
Install all exterior items that will be painted.
Paint
Make floor boards and install
Poly Floor..three coats
Mount new tires (rims are sandblasted)
Rebuild and polish windows (3 left to do)
Mount all windows
Build new wings (damn you previous owner who removed them!)
Mount wings
Wire and mount exterior lights
Make and install trim for all windows inside
Restore and recover dinette cushions.
Install toilet and plumb
Make curtains and mount rods
.... There are probably 50 other items that I am not listing here, it will make me depressed if I keep going
Enjoy the photos!
![]()
![]()
![]()
So whats left... it sounds like we are practically done. Well the answer is plenty, I am going to type these items as I think of them and its going to become my "to do" list:
Wire a couple of exterior outlets
plumb LP for hot water heater
Fix the skin (lots of dings and dents and holes oh my!)
Prep skin for paint
Rebuild door
Mount skin
Install all exterior items that will be painted.
Paint
Make floor boards and install
Poly Floor..three coats
Mount new tires (rims are sandblasted)
Rebuild and polish windows (3 left to do)
Mount all windows
Build new wings (damn you previous owner who removed them!)
Mount wings
Wire and mount exterior lights
Make and install trim for all windows inside
Restore and recover dinette cushions.
Install toilet and plumb
Make curtains and mount rods
.... There are probably 50 other items that I am not listing here, it will make me depressed if I keep going
Enjoy the photos!
 |
| Varnished Table....nice, one coat left |
 |
| Love the way the counter came out |

 |
| Miles and I do mean miles of wire in this thing |
 |
| every nook and cranny used. |
 |
| Custom sconces.....wait foooorr iiitttt |
 |
| SHHHBLLLAAMMMMM. Like a Shasta Superhero |
 |
| As you may have guess... these took a while |
 |
| They turned out just as I planned... that never happens |
 |
| These may have taken even longer. custom made under-cab lights. Also LED |


 |
| Bunk light from VTS |
 |
| Black water tank behind toilet, drawer will go on left and fresh water tank is above all of this... packed like a can of sardines |
 |
| Skylight in center of hall ... makes for a nice touch and more light |
 |
| So this little guy gave me quite a shock this weekend... he liked the warm battery and was ONTOP of it when I picked the batter up. As it slithered through my fingers... I screamed like a 12 year old girl! |
 |
| Milk snake, never seen one before, don't really need to again. |
Tuesday, July 5, 2011
Stage 3 Photos
So once the walls where up and most of the rough interior furnishings were done, it was time to put on the roof. Making the bends went pretty well with the 1/8 plywood. The front bunk nose was the hardest part. This was very close to the breaking point for the plywood, but we made it happen....slowly! I have more photos of this stage, I will add more once I find them.
All of the cabinet doors are solid mahogany as is the trim on the table and counter top. I don't show it here but all of the plumbing is in the back of the camper. The grey water tank is below the floor in the back, the black water tank is on top of the floor behind the toilet, and the fresh water tank is above the black water and the drawer. The mattress is just above the fresh water tank.
I got lucky, our neighbor had an old Komfort trailer from the 80's that was rotten. We salvaged a ton of goodies out of it. The tank monitoring system (pictures below), the fresh water tank, the grey water tank, the hot water heater and the converter/power panel... all told about $1500 or more worth of parts. Thanks again to the Gilmore's who gave us the old camper.
 |
| The peppere's checking out the tank monitor |
 |
| Counter top prior to finishing. The cut out has the sink under it. Check out the matching grain, that was tricky to do but looks fantastic. |
 |
| Tank monitoring panel |
 |
| Table... man that was a fair amount of work |
 |
| Microwave shelf next to the bunk and shower. |
 |
| Bunk prior to cutting holes for windows and vent. |
 |
| Custom made Faucet for Shower... I used brushed nickel shut off supply valves |
 |
| I can hear the skin at the tip of the bunk creaking with the desire to crack... but it survived |
 |
| Cabinet doors |
Stage 2 Photos
So by this point the walls were up, the bunk and front were in and the interior was under way. The plan was to totally change the layout... that was my plan. My fater thought I should make it back to the way it was.... I dont think so. I know, the purists out there would agree with him. But if you want to actually USE the camper, there are some logical changes that needed to happen.
MODIFICATIONS: Full size bed going along the back wall. Toiler and shower of far wall where kitchen once was. Dinette stays in the front. and a mini- kitchen opposite the bathroom with a sink and fridge. Cabinets over the rear bed, drawer under the rear bed... as well as the hot water heater and all THREE tanks and all utilities! Its a tight fit... but as you will see later, we made it happen.
![]()
![]()
![]()
MODIFICATIONS: Full size bed going along the back wall. Toiler and shower of far wall where kitchen once was. Dinette stays in the front. and a mini- kitchen opposite the bathroom with a sink and fridge. Cabinets over the rear bed, drawer under the rear bed... as well as the hot water heater and all THREE tanks and all utilities! Its a tight fit... but as you will see later, we made it happen.
 |
| You can see all of the new wood in the walls... looks like a Frank Lloyd Wright house or something |
 |
| Bathroom on the right, bed in the rear |
 |
| Toilet is in the big section of the bathroom the shower is the small section 24X24. every time I turn I will wash the sides of the shower with the hair on my arms! |
 |
| fridge/kitchen area |

 |
| Dinette bases. There are drawers under both of these. |

 |
| Counter top is solid. Birch. Mahogony edging added later. |

 |
| Cabinets at foot of bed |
 |
| Pepe with is grandson (my boy) looking out the bathorom window |
 |
| Shower. 1 piece of aluminum for all of the sides! the base was made out of another piece and sealed. This is siding that is used on tractor trailer trucks. Thick stuff, didnt bend to easy. We had to make a Rube Goldberg brake to bend it.... worked |
 |
| Cabinetts over the head of the bed. |
Subscribe to:
Posts (Atom)